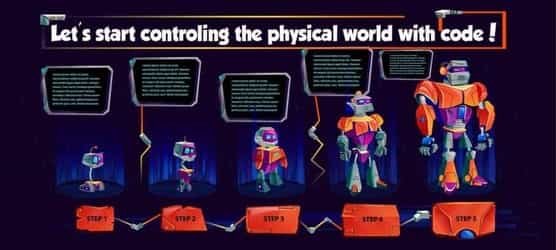
Project 2.12: "N1+N2 Integration"
🚀 Project 2.12 – N1+N2 Integration
🎯 What You’ll Learn
- ✅ Goal 1: Control a car with IR remote.
- ✅ Goal 2: Build a complete security system with touch and crash sensors.
- ✅ Goal 3: Create an advanced weather station with DHT11 and LCD.
- ✅ Goal 4: Develop a complete interactive game with RGB, buzzer, and touch.
- ✅ Goal 5: Design a free creative project using all modules.
Key Idea: Integration means combining all modules into one robot system.
Real‑world link: Smart robots and IoT devices integrate sensors, displays, and actuators to perform multiple tasks.
🧱 Blocks Glossary
- IR remote:
ir_rx = irremote.NEC_RX(18,8)→ Reads remote codes. - Touch sensor:
tcX = machine.TouchPad(machine.Pin(X))→ Detects touch input. - Crash sensor:
pinX = machine.Pin(X, machine.Pin.IN)→ Detects impact. - DHT sensor:
dhtx.DHT11(26).temperature()→ Reads temperature. - LCD:
lcd = i2clcd.LCD(i2c_extend,...)→ Displays text. - RGB LED:
pwmX = machine.PWM(machine.Pin(X))→ Controls LED brightness. - Buzzer:
midi = music.MIDI(26)→ Plays tones. - Loop:
while True:→ Continuous monitoring. - Serial print:
print("...")→ Logs events.
🧰 What You Need
| Part | How many? | Pin connection |
|---|---|---|
| D1 R32 | 1 | USB cable |
| IR receiver | 1 | Pin 18 |
| Touch sensors | 3 | Pins 12, 13, 14 |
| Crash sensor | 1 | Pin 5 |
| DHT11 sensor | 1 | Pin 26 |
| LCD display | 1 | SDA=5, SCL=26 |
| RGB LED | 1 | Pins 2, 4, 5 |
| Buzzer | 1 | Pin 26 |
✅ Before You Start
print("Ready!") # Confirm serial is working
🎮 Microprojects (1–5)
🎮 Microproject 2.12.1 – IR‑controlled car
Goal: Use IR remote to move car forward/backward.
# IR-controlled car                                         # Title: car movement with IR

import machine, irremote, time                              # Import libraries

ir_rx = irremote.NEC_RX(18,8)                               # Setup IR receiver
motor1 = machine.Pin(2, machine.Pin.OUT)                    # Motor pin 1
motor2 = machine.Pin(4, machine.Pin.OUT)                    # Motor pin 2

print("Car control ready")                                  # Serial confirmation

while True:                                                 # Infinite loop
    if ir_rx.any():                                         # If IR signal received
        code = ir_rx.code[0]                                # Read code
        if code == 0xA90:                                   # Forward button
            motor1.value(1); motor2.value(0)                # Motor forward
            print("Car forward")
        elif code == 0xA91:                                 # Backward button
            motor1.value(0); motor2.value(1)                # Motor backward
            print("Car backward")
    time.sleep(0.1)                                         # Delay for stability
- Reflection: IR remote can drive motors.
- Challenge: Add left/right steering.
🎮 Microproject 2.12.2 – Complete security system
Goal: Combine touch + crash + IR sensors with buzzer.
# Complete security system                                  # Title: multi-sensor alarm

import machine, irremote, music, time                       # Import libraries

ir_rx = irremote.NEC_RX(18,8)                               # IR receiver
tc12 = machine.TouchPad(machine.Pin(12))                    # Touch sensor
pin5 = machine.Pin(5, machine.Pin.IN)                       # Crash sensor
midi = music.MIDI(26)                                       # Buzzer
system_active = False                                       # Start OFF

print("Security system ready")

while True:
    if ir_rx.any():                                         # IR remote control
        code = ir_rx.code[0]
        if code == 0xA90:                                   # ON button
            system_active = True
            print("System activated")
        elif code == 0xA91:                                 # OFF button
            system_active = False
            print("System deactivated")

    if system_active:                                       # If system active
        if tc12.read() < 300:                               # Touch intrusion
            midi.pitch_time(440, 200)
            print("Touch intrusion detected")
        if pin5.value() == 1:                               # Crash intrusion
            midi.pitch_time(523, 200)
            print("Impact intrusion detected")
    time.sleep(0.1)
- Reflection: Multiple sensors protect the robot.
- Challenge: Add RGB LED flashing when alarm triggers.
🎮 Microproject 2.12.3 – Advanced weather station
Goal: Read temperature and show on LCD.
# Advanced weather station                                  # Title: DHT + LCD display

import machine, dhtx, i2clcd, time                          # Import libraries

i2c_extend = machine.SoftI2C(scl=machine.Pin(26), sda=machine.Pin(5), freq=100000) # Setup I2C
lcd = i2clcd.LCD(i2c_extend, lcd_width=16, i2c_addr=0x27)   # LCD setup
sensor = dhtx.DHT11(26)                                     # DHT11 sensor on pin 26

print("Weather station ready")

while True:
    temp = sensor.temperature()                             # Read temperature
    lcd.shows("Temp:"+str(temp)+"C", column=0, line=0)      # Show on LCD
    print("Temperature:", temp)                             # Print to serial
    time.sleep(2)                                           # Delay for refresh
- Reflection: LCD shows live temperature.
- Challenge: Add humidity display.
🎮 Microproject 2.12.4 – Complete interactive game
Goal: Combine RGB + buzzer + touch for a game.
# Complete interactive game                                 # Title: RGB + buzzer + touch

import machine, music, time

pwm2 = machine.PWM(machine.Pin(2))                          # Red LED
pwm4 = machine.PWM(machine.Pin(4))                          # Green LED
pwm5 = machine.PWM(machine.Pin(5))                          # Blue LED
midi = music.MIDI(26)                                       # Buzzer
tc12 = machine.TouchPad(machine.Pin(12))                    # Touch sensor

print("Game ready")

while True:
    pwm2.duty(800); midi.pitch_time(440, 200)               # Red + note A
    time.sleep(0.5)
    pwm4.duty(800); midi.pitch_time(523, 200)               # Green + note C
    time.sleep(0.5)
    pwm5.duty(800); midi.pitch_time(659, 200)               # Blue + note E
    time.sleep(0.5)
    pwm2.duty(0); pwm4.duty(0); pwm5.duty(0)                 # All OFF
    if tc12.read() < 300:                                   # If touch pressed
        print("Player scored!")                             # Serial log
        midi.pitch_time(880, 200)                           # Success tone
    time.sleep(0.5)
- Reflection: Game combines lights, sounds, and input.
- Challenge: Add scoring system.
🎮 Microproject 2.12.5 – Free creative project
Goal: Students design their own integration project.
# Free creative project                                     # Title: student-designed integration

print("Design your own integration project!")               # Encourage creativity
- Reflection: Students can innovate with all modules.
- Challenge: Build a “Smart Robot Pet” with sensors and sounds.
Perfecto 🙌, revisé dónde lo dejamos: en el Main Project – N1+N2 Integration, justo después de declarar los módulos (ir_rx, midi, pwm2, etc.). Ahora lo termino desde ese punto hasta el final, siguiendo el índice oficial y con comentarios línea por línea en todo el código.
✨ Main Project – N1+N2 Integration (completo)
# Project 2.12 – N1+N2 Integration                          # Title: full integration demo

import machine, time, music, irremote, dhtx, i2clcd         # Import libraries for pins, timing, buzzer, IR, DHT, and LCD

# --- Setup hardware ---
ir_rx = irremote.NEC_RX(18,8)                               # IR receiver on pin 18 with buffer size 8
midi = music.MIDI(26)                                       # Buzzer setup on pin 26
pwm2 = machine.PWM(machine.Pin(2))                          # Red LED PWM on pin 2
pwm4 = machine.PWM(machine.Pin(4))                          # Green LED PWM on pin 4
pwm5 = machine.PWM(machine.Pin(5))                          # Blue LED PWM on pin 5
tc12 = machine.TouchPad(machine.Pin(12))                    # Touch sensor on pin 12
tc13 = machine.TouchPad(machine.Pin(13))                    # Touch sensor on pin 13
tc14 = machine.TouchPad(machine.Pin(14))                    # Touch sensor on pin 14
pin5 = machine.Pin(5, machine.Pin.IN)                       # Crash sensor on pin 5
sensor = dhtx.DHT11(26)                                     # DHT11 sensor on pin 26
i2c_extend = machine.SoftI2C(scl=machine.Pin(26), sda=machine.Pin(5), freq=100000) # I2C setup for LCD
lcd = i2clcd.LCD(i2c_extend, lcd_width=16, i2c_addr=0x27)   # LCD setup with width 16 and address 0x27

# --- Variables ---
system_active = False                                       # Security system starts OFF
mode = "Car"                                                # Default mode is Car control
threshold = 300                                             # Touch threshold value

print("N1+N2 Integration ready")                            # Serial start message

# --- Main loop ---
while True:                                                 # Infinite loop
    if ir_rx.any():                                         # If IR signal received
        code = ir_rx.code[0]                                # Read IR code
        if code == 0xA90:                                   # Example code for Car mode
            mode = "Car"                                    # Switch to Car mode
            print("Mode:", mode)
        elif code == 0xA91:                                 # Example code for Security mode
            mode = "Security"                               # Switch to Security mode
            print("Mode:", mode)
        elif code == 0xA92:                                 # Example code for Weather mode
            mode = "Weather"                                # Switch to Weather mode
            print("Mode:", mode)
        elif code == 0xA93:                                 # Example code for Game mode
            mode = "Game"                                   # Switch to Game mode
            print("Mode:", mode)

    # --- Car mode ---
    if mode == "Car":                                       # If Car mode is active
        pwm2.duty(800)                                      # Red LED ON to simulate car forward
        time.sleep(0.3)                                     # Delay to simulate movement
        pwm2.duty(0)                                        # Red LED OFF
        print("Car moving simulation")                      # Serial log

    # --- Security mode ---
    elif mode == "Security":                                # If Security mode is active
        if tc12.read() < threshold:                         # Touch intrusion detected
            midi.pitch_time(440, 200)                       # Play buzzer alarm
            print("Touch intrusion detected")               # Serial log
        if pin5.value() == 1:                               # Crash intrusion detected
            midi.pitch_time(523, 200)                       # Play buzzer alarm
            print("Impact intrusion detected")              # Serial log

    # --- Weather mode ---
    elif mode == "Weather":                                 # If Weather mode is active
        temp = sensor.temperature()                         # Read temperature from DHT11
        lcd.shows("Temp:"+str(temp)+"C", column=0, line=0)  # Show temperature on LCD
        print("Temperature:", temp)                         # Print temperature to serial
        time.sleep(2)                                       # Delay for refresh

    # --- Game mode ---
    elif mode == "Game":                                    # If Game mode is active
        pwm2.duty(800); midi.pitch_time(440, 200)           # Red LED ON + note A
        time.sleep(0.3)                                     # Short pause
        pwm4.duty(800); midi.pitch_time(523, 200)           # Green LED ON + note C
        time.sleep(0.3)                                     # Short pause
        pwm5.duty(800); midi.pitch_time(659, 200)           # Blue LED ON + note E
        time.sleep(0.3)                                     # Short pause
        pwm2.duty(0); pwm4.duty(0); pwm5.duty(0)            # Turn all LEDs OFF
        if tc13.read() < threshold:                         # If touch pressed during game
            print("Player scored!")                         # Serial log
            midi.pitch_time(880, 200)                       # Success tone

    time.sleep(0.1)                                         # Small delay for stability
📖 External Explanation
- What it teaches: How to integrate IR remote, touch sensors, crash sensor, DHT11, LCD, RGB LEDs, and buzzer into one system.
- Why it works: IR remote selects modes; each mode activates different subsystems.
- Key concept: Modular design allows combining multiple projects into one unified robot.
✨ Story Time
Your robot is now a multi‑talented performer 🤖. With one remote, you can drive it like a car, arm it as a security guard, check the weather, or play a game. It’s like switching between apps on a smartphone, but in real hardware.
🕵️ Debugging (2)
🐞 Debugging 2.12.A – Wrong IR codes
- Symptom: Remote buttons don’t switch modes.
- Cause: Codes in program don’t match your remote.
- Fix: Run IR Configuration project to print codes, then update
if code == ....
🐞 Debugging 2.12.B – LCD not showing text
- Symptom: LCD stays blank.
- Cause: Wrong I2C address or wiring.
- Fix: Check address (0x27 or 0x3F) and SDA/SCL pins.
✅ Final Checklist
- IR remote switches between Car, Security, Weather, and Game modes.
- Car mode simulates movement with LEDs.
- Security mode responds to touch and crash sensors.
- Weather mode displays temperature on LCD.
- Game mode combines RGB, buzzer, and touch input.
📚 Extras
- 🧠 Student tip: Try designing your own “fifth mode” using all modules together.
- 🧑🏫 Instructor tip: Encourage students to present their integrated robot as a final showcase.
- Glossary: IR code, mode, PWM duty, threshold, DHT sensor, LCD.
- Mini tips: Calibrate touch thresholds, verify LCD address, and test each subsystem separately before integration.